Tuesday, August 31, 2010

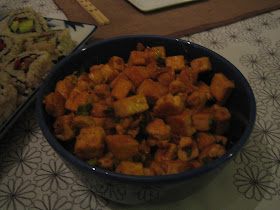
Truffle Infused Portobello & Kale with Cream Cheese & Chive Mashed Potatoes

Ingredients
2 large red potatoes-diced (keep skins on)
1/2 cup cream cheese
2 Tbs white truffle oil
1/4 cup chives-chopped
1 tsp sea salt
2 cups kale-stem removed & cut into bite size pieces
2 portobello mushrooms-sliced (dice stems)
2 garlic cloves-sliced

Directions
1. Place potatoes in a large saucepan and cover with cold water
2. Bring water to a boil and cook until tender-about 8 minutes depending on the size of the cut
3. Meanwhile, saute the mushrooms in enough water to cover the bottom of the pan-2 minutes
4. Add 1 1/2 Tbs truffle oil, garlic, 1/2 tsp sea salt, and kale, saute 4 more minutes until kale has wilted
5. When potatoes are done cooking, drain the water reserving 1/2 cup for mashing
6. Add cream cheese, 1/2 tsp salt, 1/2 Tbs truffle oil, and chives to the potatoes and mash until smooth
7. Layer mashed potatoes in the center of the plate and top with the mushroom and kale mixture

This was a quick meal that I wiped up after work tonight. I had some potatoes that needed to be used up and I was in the mood for something comforting with the gloomy weather. When you cut the potatoes small they cook super fast, so keep your eye on them. Just check them by poking them with a fork and if it slides in easy they are done. You also saved time by not having to peel the potatoes and then you also have more nutritional benefits. I also had some leftover cream cheese that needed to be used, so feel free to exclude it. However, the cream cheese does make the mashed potatoes super creamy. I thought this was a great way to serve greens for people that are not huge fans of eating greens by themselves. I just got the white truffle oil, so I have been excited to explore with it. I love truffle oil! It makes your house smell amazing! It is a little pricey, but you only need a little because it is so strong, so it lasts forever. I recommend storing the majority of the oil in the fridge so that it lasts longer. I keep a small amount at room temperature because the oil in the fridge slightly solidifies.

Wednesday, August 25, 2010

Chipotle Veggie Salad


Ingredients
2 cups romaine, washed & cut into bite size pieces
1/2 cup pinto beans
1/4 cup corn
1/4 avocado, diced
1/2 cup red pepper, thinly sliced
1/4 cup raw pumpkin seeds
1/4 cup cilantro, chopped

Dressing
1-2 Tbs low-fat veganaise
1/2 tsp adobo sauce from can of chipotles
juice of half lime
1/2 clove garlic, pressed
1 tsp cilantro, chopped

Directions
1. Mix all dressing ingredients together
2. Layer salad ingredients in the order above, top with dressing

I had some leftover chipotle mayo from last night, so I decided to add some lime juice to make it a salad dressing. It turned out great because it was the right consistency and it had a creamy flavorful taste. You can throw in what ever veggies you prefer, this is just what I had on hand. Just make sure that you add some protein, like beans or nuts. I highly recommend raw pumpkin seeds. I love the taste and they are super healthy for you! I always have some on hand to add to salads, pasta dishes, or where ever I want to add some nutritious protein. Pumpkin seeds are naturally rich in protein, zinc, essential fatty acids, magnesium, iron, and fiber. They contain most of the B vitamins, along with C, D, E, and K! Pumpkin seeds are rich in the amino acids alanin, glycine and glutamic acid. So basically you should try to eat them a couple times a week.


Tuesday, August 24, 2010

The Ultimate Chipotle Portobello Burger


Ingredients
1/2 onion-thinly sliced
1 Tbs safflower oil
3 slices fakin bacon
2 portobello mushrooms
1/2 tomato-thinly sliced
1/2 avocado-sliced
1/2 cup daiya vegan mozzarella cheese
1/2 cup romaine
4 slices Great Harvest sunflower bread-toasted

Chipotle Mayo
1/2 cup lowfat veganaise
1 tsp adobo sauce in chipotle can
1 clove garlic-minced
2 Tbs cilantro-chopped

Directions
1. Saute onions on low heat for about 10 minutes with 1/2 Tbs of safflower oil, until caramelized, set aside
2. Saute mushrooms for 4 minutes on each side on medium heat with 1/2 Tbs safflower oil, with the bacon cooking on the edges of the pan
3. The last minute of cooking the mushrooms, add the cheese to the top of the mushrooms
4. Meanwhile, mix all mayo ingredients together
5. Layer sandwich: bread, mayo, tomatoes, avocado, mushroom, onions, & romaine

I whipped up this sandwich quickly tonight after looking at some things that needed to be used up in the fridge. These sandwiches turned out to be amazing, but they were so filling! I would recommend splitting a sandwich with someone. I don't think I have ever made such a large sandwich, but I was having fun adding all the ingredients, so I thought why not. The tomatoes came from my Mom's garden and they were delicious! You don't have to use the vegan cheese, but I really like this brand because it has a great flavor and it's much healthier than regular cheese. You won't end up using all of the mayo for the 2 sandwiches, so I suggest saving the leftovers. I am actually using the leftovers as a dressing for my salad that I packed for my lunch tomorrow.


Sunday, August 22, 2010

Spicy Rice

Ingredients
2 cups cooked brown rice
1 cup red pepper-thinly sliced
1 cup simmered shiitake mushrooms (recipe from sushi dinner)
1 green onion-sliced
2 Tbs sesame seeds
2 Tbs lowfat veganaise (mayo)

Sauce
3 Tbs shoyu (soy sauce)
2 Tbs sriracha sauce (use 1 Tbs for medium heat)
2 Tbs rice vinegar
1 Tbs maple syrup
2 tsp sesame oil

Directions
1. Saute red peppers in a nonstick pan for 3 minutes on medium
2. Meanwhile, mix the sauce ingredients together
3. Add cooked rice and sauce to the pan-cook on medium heat until the sauce reduces down to a creamy texture
4. Turn heat off and add mushrooms, green onions, sesame seeds, & veganaise

I made a sushi dinner last night for good friends (my dear bearded friend-ha!) and had a good amount of leftovers, so I decided to throw this together for a quick spicy supper. The sauce recipe is the same that I used for the spicy tofu I made for the sushi dinner. I love this recipe and I have used it several times. It's great because it consists of pantry items that I always have on hand. This dish was pretty spicy, so if you are a typical Minnesotan you might want to only add 1 Tbs of the sriracha. You can always add more at the table. Although the dish looks really creamy, which I often associate with high fat, this is actually a low fat super healthy meal!

Monday, August 16, 2010

Fusilli Pasta with Chanterelles in a Bacon & Garlic Sauce


Ingredients
1/2 pkg of fusilli bucati lunghi pasta
1/4 cup olive oil
2 slices tempeh bacon-diced
3 cloves garlic-sliced
2 cups chanterelle mushrooms-cut into bite size pieces
1 cup savoy cabbage-shredded
1 cup frozen peas
1 tsp sea salt
1/2 tsp freshly cracked pepper

Directions
1. Bring a large pot of water to a boil, add pasta, & cook for 10 minutes
2. Meanwhile, heat olive oil in a large pan & saute bacon for 1 minute
3. Next add the garlic & saute 1 more minute
4. Add mushrooms & cabbage, saute 5 minutes-continually stirring to make sure garlic doesn't burn to the bottom of the pan
5. Add the frozen peas to the pasta water for the last two minutes of cooking
6. Add 1/2 cup of pasta water to the frying pan & stir, loosening any bits stuck to the pan
7. Drain the pasta & peas, reserving 1/2 cup of pasta water
8. Add pasta to the frying pan & combine

This is a super easy and healthy pasta that I whipped up real quick. I knew I wanted to use the new long fusilli pasta & the chanterelles that I bought. I have been seeing the long fusilli pasta in a lot of cooking magazines lately and I was intrigued by the unique fun shape. This was my first time cooking with chanterelles and I was very satisfied! I have been craving chanterelles ever since I read the Omnivore's Dilemma for my Environmental Sociology class, because the author talked about going hunting for morels & chanterelles and he had an amazing way of describing their delicious flavor. I think it is important to not cut the mushrooms too small because they shrink up when they cook and you want to have a larger piece so that you can get a good sample of their flavor. I saw the tempeh bacon in the fridge and I was inspired to add it to the pasta to add a smoky flavor. I decided to slice the garlic instead of using my garlic press as usual to add a different flavor element. I used the leftover cabbage from my cabbage rolls, which tastes mild and sweet and is loaded with good nutrition. I also think the peas were a nice touch because they add a touch of sweetness & great color. You can have this dinner on the table in 15 minutes, which is faster than ordering takeout and much healthier!


Cabbage Rolls

Ingredients
6 savoy cabbage leaves
1/2 cup onion-diced
2 cloves garlic-pressed
1/2 cup red pepper-diced
2 portobello mushrooms-diced
1 cup cooked brown rice
1/2 cup navy beans

Tomato Sauce
1 large tomato-diced
1/2 cup veggie tomato juice
4 cloves garlic-pressed
1 tsp agave nectar
1 tsp olive oil
1 tsp red pepper flakes
1/2 tsp fresh thyme
2 tsp fresh oregano
1 tsp garlic powder
1 tsp sea salt
1/2 tsp pepper

Makes 6 cabbage rolls, serves 3

Directions
1. Start making the tomato sauce first so that it can simmer while you are preparing the rest of the meal and the flavors can develop
2. Place the tomato & the remaining ingredients in a saucepan & bring to a low boil
3. Once the sauce is boiling turn the heat to low and allow to simmer for 30 minutes
4. Meanwhile, saute onion for 3 minutes, then add garlic and saute for 1 more minute
5. Meanwhile, bring a large pot of water to a boil, place the cabbage leaves in the water and boil for 5 minutes, & remove the hard cores-preheat oven to 350 degrees
6. Add red pepper & mushrooms to the onion pan and cook for 3 minutes
7. Turn heat to low and stir in rice and beans-cook until warmed through
8. Assemble cabbage rolls: lay cabbage leaf on counter and fill the center with the rice mixture and roll up like a burrito, place seam side down in a baking dish, continue with the remaining cabbage leaves, top with tomato sauce, cover with tin foil, & bake @350 degrees for 40 minutes

I have never made cabbage rolls, but I love cabbage and I happened to have some on hand so I thought these would be good. The filling basically consisted of leftovers I had in the fridge. The red pepper and brown rice was leftover from the sushi I made the other day. The navy beans were leftover from a sandwich spread I made the other day for lunch. So basically you can make whatever you would like for the filling, you don't have to follow my recipe religiously. I was just happy that I got to clean out my fridge and have a super healthy meal in the process. The tomato sauce was Eric's favorite! The tomato was fresh from my Mom's garden, so that helped to make it even better. I did put a lot of garlic in the sauce, but it wasn't overwhelming.

Sushi Dinner


Veggie Sushi

Ingredients
2 cups cooked brown rice
1 Tbs rice vinegar
1/2 tsp agave nectar
1/2 tsp sea salt
2 nori sheets
1/2 avocado-sliced
1/2 red pepper-sliced
2 Tbs sesame seeds

Makes 2 rolls=12 pieces

Directions
1. Mix rice vinegar, agave nectar, & salt together
2. When the brown rice is done cooking add the vinegar mixture & mix
3. Spread rice on a baking sheet with a damp paper towel on top to allow to cool & stay moist
4. Lay sushi mat so that the wooden sticks are positioned horizontally & place a sheet of nori on top
5. Spread a thin layer of rice on top of nori leaving a 1/2 inch border & sprinkle sesame seeds on top
6. Place plastic wrap on top of the rice and lightly press to ensure the rice is secure
7. Flip the nori sheet over on the mat, so that the rice is on the bottom
8. Place the red pepper and the avocado slices horizontally on the nori sheet
9. Start to roll the nori sheet firmly compressing as you roll, and pull out the plastic wrap as you roll
10. With a damp sharp knife, cut the sushi roll in half, and each half into thirds-repeat with second roll
11. Refrigerate until ready to serve-only good for 24 hours

Simmered Shiitake Mushrooms

Adapted from Vegetarian Times
Ingredients
1 oz dried shiitake mushrooms
1 inch of ginger-sliced
1 Tbs mirin
1 tsp brown sugar
1 Tbs soy sauce

Directions
1. Place boiling water over dried mushrooms in a bowl and cover with a plate for 30 minutes
2. Drain mushrooms, reserving 1 cup of soaking liquid
3. Place mushrooms, soaking liquid, ginger, mirin, & brown sugar in a pan and bring to a boil
4. Lower heat and simmer for 15 minutes
5. Add soy sauce and simmer for 10 more minutes

Spicy Tofu

Adapted from Vegetarian Times
Ingredients
1 pkg firm tofu-cut into 1/4 inch cubes
1 1/2 Tbs soy sauce
1 Tbs Sriracha
1 Tbs rice vinegar
1/2 Tbs maple syrup-grade B
1 tsp sesame oil
2 green onions-thinly sliced
1 Tbs vegonaise

Directions
1. Cook tofu in nonstick pan over medium high heat for 10-12 minutes until golden
2. Stir soy sauce, sriracha, vinegar, maple syrup, sesame oil, & 1 Tbs of water together
3. Add to the cooked tofu and cook for 2-3 minutes
4. Remove from heat & add green onions and mayo

I was inspired to make this dinner after reading my Vegetarian Times' section on hosting a sushi party. I had never made sushi because I thought it was too intimidating, but I came to find out it was super easy! I thought the rolling part would be hard, but if you don't overstuff the roll (like I did) it is much easier. I didn't serve the sushi with the typical wasabi because Eric and I used to be big wasabi fans, but we overdid it and now we pass on it. Eric actually used sriracha sauce as his spice, which is too hot for me so I opted for soy sauce. The funny thing is that I actually never liked raw fish in my sushi even when I did eat meat. With this recipe you don't have to worry about getting sick from raw fish & it's cheaper:) You can play around with the veggies that you fill the roll with. I just recommend using veggies with different colors, so that it is appealing. I also decided to use brown rice to bump up the nutrition factor. I also prefer to have my rice on the outside of the roll because I am not a huge fan on nori. This way you first bite into sweet rice rather than a fishy paper.

Eric and I couldn't decide what we liked better, the spicy tofu or the shiitake mushrooms. They were amazing!! I am going to be making these again! I also loved the spicy sauce on the tofu because I made some more the next day and added it to some leftover pasta and it was awesome! The mushrooms had such a great flavor! I was surprised how well the dried mushrooms turned out. That was my first time using dried mushrooms, so now I won't have to worry about the flavor being compromised.

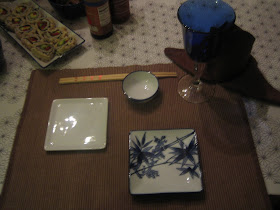
It's also fun to use traditional Asian dishes and chopsticks! It makes it feel more special and I prefer the woodiness of the chopsticks compared to the metallic taste of traditional silverware.

Thursday, August 12, 2010

Pickled Beets

Ingredients
2 cups white vinegar
4 cups water
5 cups sugar
Enough beets to fill the 7 pint jars when they are quartered ( I eye-balled it)
7 pint jars-freshly washed

Directions
1. Clean the beets and cut off any greens
2. Cook beets in pressure cooker for 15 minutes, until tender
3. Cool beets & peel off skins
4. Quarter beets & place in clean pint jars
5. Have lids boiling in a pan
6. Meanwhile, place vinegar, water, & sugar in a saucepan and bring to a boil
7. Pour vinegar mixture into the pint jars filled with the beets
8. Take a clean towel and wipe the mouth of the pint jar off
9. With a tongs remove a lid from the boiling water & seal the jar tight
10. Continue process with remaining jars
Enjoy after one week of sitting at room temperature. Refrigerate after opening.

Eric and I are crazy about pickled beets! I have always loved my Mom's recipe (which is actually my Grandmas) and my Mom and I had talked about getting together so that she could teach me how to can. So yesterday I drove down with my pint jar and beets and she shared her skill with the next generation. The co-op didn't have enough purple beets, so I bought a few golden beets. They are suppose to taste the same, but the perk to this type is that they don't bleed their color onto everything. So if you don't like having your hands stained, buy the golden beets or just use rubber gloves when you are peeling the purple type like I did. I was surprised how easy they were to make, especially with the pressure cooker. I don't have one, but I think it will be on my xmas list. You can still make these without a pressure cooker, but it will take a lot longer. Now I want to learn how to can everything! Thanks Mom for helping me out!

Double Chocolate Waffles


Adapted from Vegetarian Times

Ingredients

Chocolate Sauce
1/4 cup cocoa powder
1/4 cup maple syrup-grade B
2 Tbs unsweetened almond milk
1/2 tsp vanilla extract

Waffles
1 1/3 cups all-purpose flour
1/2 tsp baking soda
1/4 tsp sea salt
2/3 cup unsweetened almond milk
1/2 tsp apple cider vinegar
5 Tbs unsweetened cocoa powder
1 oz Ghiradelli semisweet chocolate-chopped
1/3 cup brown sugar
1/4 cup safflower oil
1/2 tsp vanilla extract
Powdered sugar for dusting

1. Whisk together almond milk and apple cider vinegar and let sit for 10 minutes
2. Whisk together flour, baking soda, and salt
3. Preheat waffle iron
4. Boil 1/4 cup water and mix with cocoa powder and chocolate until smooth
5. Whisk almond milk mixture with chocolate, then add in brown sugar, oil, & vanilla
6. Finally mix in flour mixture
7. Brush waffle iron with oil, and spoon batter into iron-cook until waffle is crisp
8. Meanwhile, mix chocolate sauce ingredients together and simmer on low heat until melted together and smooth
9. Drizzle chocolate sauce over the waffle and sprinkle with powdered sugar

I was reading my Vegetarian Times magazine when I was hungry (which is a bad idea) and I saw these waffles and I thought they would be a great dessert. Although the magazine said that it could be a meal, I thought it would be too sweet for an actual meal. Then Eric saw the picture and said that they looked amazing, so I had to make them then:) He was nice enough to lend his high school restaurant skills when plating the waffles.

Tropical Navy Bean Sandwich


Ingredients
3/4 cup navy beans
1/2 cup tropical salsa (recipe on last post)
1 Tbs veganaise (mayo)
1 clove garlic-pressed
2 slices toasted Great Harvest sunflower wheat bread

Directions
1. Mix beans, salsa, mayo, & garlic together
2. Spread on bread slices

This was a quick lunch that I wiped up the other day. If I am in a hurry I'll often open a can of beans, mix it with some garlic mayo, and stick in leftover yummy ingredients that I find in the fridge. Beans are a great sandwich filler.


Marinated Baked Tofu Steaks with Tropical Salsa


Ingredients
1 block of tofu-cut into 6 steak slices
1 tsp sesame oil

Marinade
1 Tbs ginger-minced
2 cloves garlic-pressed
1 tsp red pepper flakes
1 tsp cumin
1 tsp chili powder
3 Tbs shoyu (soy sauce)

Salsa
1 medium sized Jicama-diced
1 mango-diced
1/2 cucumber-seeded & diced
1 red fresno chili pepper-minced
Juice of half a lime
1/2 cup cilantro-chopped
1 tsp agave nectar
1 tsp sea salt
1 tsp cumin

Serves 2 (leftover salsa)

Directions
1. Prepare salsa first so it has time for the flavors to develop. Combine all the salsa ingredients, mix, and refrigerate for 2 hours.
2. Mix marinade ingredients together, spoon mixture over tofu steaks on both sides, place on a plate, and refrigerate for 30 minutes.
3. Preheat oven to 375 degrees, brush baking sheet with the sesame oil, layer tofu steaks on baking sheet, bake for 30 minutes turning halfway through.
4. Place 3 tofu steaks on the center of each plate and top with tropical salsa

I was inspired to make this recipe because I wanted to play around with Jicama because I have never cooked with it before. I thought that it would work best in a tropical salsa and with this hot weather I thought it would be refreshing. I have only made tofu steaks once before and I have been craving them ever since, so this was a good excuse for making them. It is so easy to make the tofu steaks and they have such a nice crunchy texture. You can't get this texture by pan frying it. Tofu is a blank slate, so you can be creative! You will have plenty of salsa leftover, so you can eat it simply with chips or find another creative use for it. This is a healthy light summer dinner that is very filling.

Monday, August 9, 2010

Nacho Fiesta BLT


Ingredients
4 slices of Great Harvest Nacho Cheese bread
5 slices tempeh bacon
2 Tbs veganaise/mayo
1 clove garlic-pressed
3 sheets of napa cabbage
5 slices yellow tomato
1/2 cup sliced onions
1 Tbs safflower oil

Directions
1. Saute onions in the oil for 4 minutes or until browned
2. Push onions to the side of the pan to keep warm and put the bacon in the center to cook for 3 minutes or until browned
3. Mix the mayo and the garlic together
4. Spread garlic mayo on each slice and top with remaining ingredients

I decided to make another sandwich with the amazing nacho cheese bread. I am still bummed that I can't get it anymore, especially after looking at the pictures it makes my mouth water. The caramelized onions added a nice sweetness to the sandwich and the yellow tomatoes added a unique twist. Yellow tomatoes are also less acidic if that is something that appeals to you. I used cabbage instead of the typical lettuce to add more nutrition and a nice crunch.

Nacho Fiesta Sandwich

Ingredients
4 slices of Great Harvest Nacho Cheese bread
1/2 avocado-sliced
4 slices of tomato
1 can of chili beans
1 can black olives
2 Tbs raw pumpkin seeds
2 Tbs chopped cilantro
2 Tbs adobo sauce
4 Tbs veganaise/mayo

Serves 2-extra bean mixture for leftovers

Directions
1. Mix beans, olives, pumpkin seeds, cilantro, adobo sauce, and mayo together
2. Spread bean mixture on bread and top with tomato and avocado

I was inspired to invent this sandwich after I bought a loaf of the amazing Great Harvest Nacho Cheese bread. The bread was so fresh and flavorful! The only bummer is that they only make this bread twice a year! So sad! So look for this bread on Cinco de Mayo and some random summer day:)

I served the sandwich with the fresh guacamole and the best veggies chips ever that I get at Trader Joes. They have flaxseeds in them, so it makes me feel better when I am eating chips:)

*Sorry for bad picture, there was poor lighting.

Meaty Lentil Soup

Ingredients
1 onion-diced
3 cloves garlic-pressed
1 cup carrots-diced
1 diakon radish-sliced
1 cup sweet potato-diced
2 cups cremini mushrooms-sliced
1 cup corn
1 cup zucchini-diced
1 Tbs cumin
1 Tbs garlic powder
1 Tbs sea salt
1 tsp pepper
2 cups lentils
6 vegetable bouillon cubes
12 cups filtered water
1 cup cilantro-chopped

Directions
1. Saute onion until translucent
2. Add garlic & spices-saute 1 minute
3. Add mushrooms-saute 3 minutes
4. Add diakon, carrots, sweet potatoes, zucchini, & corn-saute 2 minutes
5. Add water and lentils-bring to boil
6. Add vegetable bouillon cubes-simmer for 50 mins
7. Stir in cilantro and serve

I made this soup before I went to the cabin with my family. I thought it would be great for a quick lunch and my Mom and sisters are huge soup lovers! The flavor only got better over time. The soup was also a great way to clean out my fridge before I left for the week, so that nothing would be wasted. So you don't need to have all the veggies I had, just use what you have on hand. This recipes makes enough to probably feed 12 people or more. It's really filling with the lentils and tastes really meaty with the mushrooms.

Quick Pickles

Ingredients
1/2 large cucumber-thinly sliced
1/4 onion-sliced
1 clove garlic-pressed
2 Tbs fresh dill
1 tsp agave nectar
1 tsp sea salt
1/2 tsp freshly cracked pepper
1 cup white vinegar

Directions
1. In a bowl, mix together vinegar, agave nectar, garlic, dill, salt & pepper.
2. Next, stir in cucumbers and onions
3. Place in Mason jar, seal tight, & refrigerate for 1 day

Lately I have been seeing a lot of recipes for quick pickles so I was inspired to try my own recipe. I thought it would be fun to try agave nectar instead of the typical sugar to make it a little healthier. I have a jar of fresh dill that I froze, which has been nice when I occasionally need dill. The dill texture becomes weaker in the freezing process, but the flavor is just as fresh.